Showing posts with label cooking. Show all posts

Saturday, July 12, 2014

The Absolute Newbie's Guide to Chicken Cacciatore & Pasta


I know what you're thinking. Jodi...how can I possibly make this delicious looking meal myself? I am no gourmet cook. Ah, but you're wrong. You can and you will! Just follow these simple, newbie-friendly instructions!

First, a list of things you will need:

  • 1 tablespoon vegetable oil 
  • 1 1/4 pounds skinless, boneless chicken breasts 
  • 1 3/4 cups Chicken Broth or Chicken Stock
  • 1 teaspoon dried oregano 
  • 1 teaspoon garlic powder 
  • 1 can (14.5 ounces) diced tomatoes 
  • 1 small green pepper, cut into 2-inch-long strips (about 1 cup) 
  • 1 medium onion, cut into wedges 
  • 1/4 teaspoon ground black pepper 
  • 2 1/2 cups uncooked medium shell-shaped pasta 

Boneless chicken breasts come in packages in the meat department and vary in size from one to two pounds. There's usually both a generic store brand and a name brand (like Perdue.) The store brand is fine. If you freeze the package, you have to take it out of the freezer and put it into the fridge the morning before you plan to cook it. (as in..it takes at least a full day to thaw.) When you take the chicken out of the package you have to wash it. Just run it under warm water and rub it until it doesn't feel slick or gooey, and pull off any extra fat with your hands. It takes like a minute, tops. (Wash your hands after handling raw chicken, unless you're highly fond of extreme intestinal discomfort and/or food poisoning.) For this recipe, use a sharp knife to cut them into bite-sized chunks. This is about 1 1/2 lbs of chicken. Don't worry if you're a bit over or under what the recipe calls for. (A bit. If you have TWICE as much, double the rest of the recipe, obviously.)


The onion and pepper will be in your produce department (of course.) You'll see a lot of different onions, but I usually just buy a single, decent-sized Sweet Vidalia Onion. I usually buy one Green Pepper too. Your store probably separates the organic veggies in their own case...they are more expensive than 'regular' veggies, so be aware and don't buy from the organic case if don't care. How do you know if your produce is good? Well...if it's spotty, brown, soft or ugly looking, you should probably take a pass. It should be decently firm, and look like the pictures of produce you see on the walls at your local Subway. Here...are mine:


These are some sexy looking veggies!  To cut up an onion, use a sharp knife to chop off the top and bottom half and peel off that first layer of outer skin. (It just comes right off with your hand.) What you're left with is this:


Then cut this in half down the middle and chop that one half up. Because this recipe calls for 'One Medium Onion' and Vidalia Onions are big, just use half and save the other half in a baggie in the fridge for using in other things. A good sharp knife matters. It should slice through this like butter. If you're sawing at your onion, you're doing it wrong.


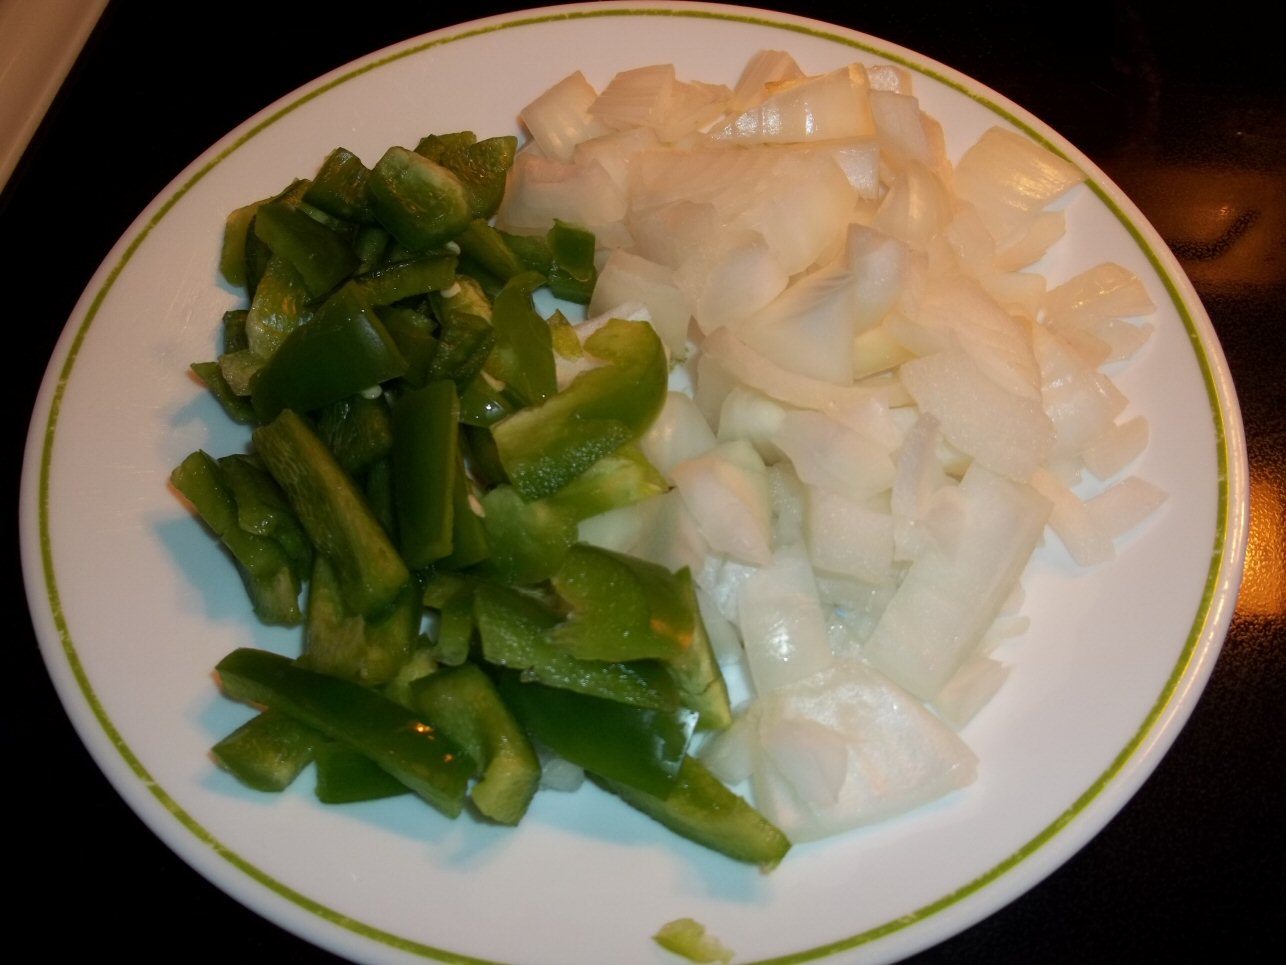
To cut up a pepper, cut around the top. Peppers are hollow and there's like this...mother ship of an internal stem attached to the top. When you cut into it, you'll see what I mean. You just cut right around that and throw it away. Then cut the pepper in half length-wise and remove any whitish spine parts and seeds. What you're left with is this, which is easily sliced into the sticks this recipe needs:


The recipe calls for about a cups worth of green peppers...so don't assume you have to use the whole thing. Anything you don't use...stick in a plastic baggy and toss in the fridge. Be sure to make other cool gourmet stuff during the week to use up your leftover pepper and onion!

If you've never done these things before...do them this week. Learn how to do it...it will open an entire new world of recipes to you! And you'll be eating veggies in a cool, tasty way...which is never a bad thing!

Put your veggies on a happy little plate like this one and set them aside for a minute.

Now...let's continue with our recipe!

Heat your tablespoon of oil in a 10-inch skillet over medium-high heat. Add the chicken and cook for ten minutes. Your chicken will create juices while it cooks.


Somewhere around the 7 minute mark, you might want to put the cover on the skillet and tilt it carefully over the sink and drain all those juices out. Takes like five seconds and it will get rid of the excess liquid and some of the oil, which is good. :) Put it immediately back on the heat and move your chicken around the pan for a few more minutes to get the pieces slightly brown.


Good enough. Now, we're gonna add all this stuff:


I buy my chicken broth in these boxes. They're just the right size for this recipe and hey, no tin can sitting in a land fill. You can use store brands. You can use name brands. I care not! Your hungry family cares not! Your Chicken Cacciatore cares not! We're all just that cool and carefree like that!  

I didn't use pasta shells. I had elbows laying around, so I used those, because I don't care!

You may want to drain the extra juice from the diced tomato can. Depends on how much you like tomatoes. No offense to tomatoes, but I drain mine. So yeah, let's stir in the broth, oregano, garlic powder, tomatoes, green peppers, onion and black pepper, and then stir in the pasta. And oh! Look at this! You've already created something that looks extremely PRO!


Reduce the heat to medium-low, put the lid on your skillet and cook for around 15 minutes. Unless you smell something burning, you shouldn't lift the lid to peek. The pasta is both cooking and steaming in there.

Pasta knows how to party! 

After 15 minutes, take off the lid and stir your Chicken Cacciatore up! Dole it into bowls. Wait..wut? Yes! We're done!! You did it!!!!!!! Now you get to eat your delicious food with the added pride of knowing that you did it yourself! Not only that, but you made something that's relatively healthy!! You're amazing! GREAT JOB!!!


Wednesday, March 12, 2014

Stupid Easy Pineapple Mango Chicken


1. Cut up Chicken


2. Sprinkle with cumin and fry in pan until brown on both sides. (About ten minutes)


3. Pour a cup of Mango salsa over the chicken.  Add some Crushed Pineapple. Reduce the heat to low.  Cover and cook for 15 minutes or until the chicken is cooked though.


4. Serve over rice or shred and serve in a taco. 


5. Look incredibly pro! 

Saturday, January 4, 2014

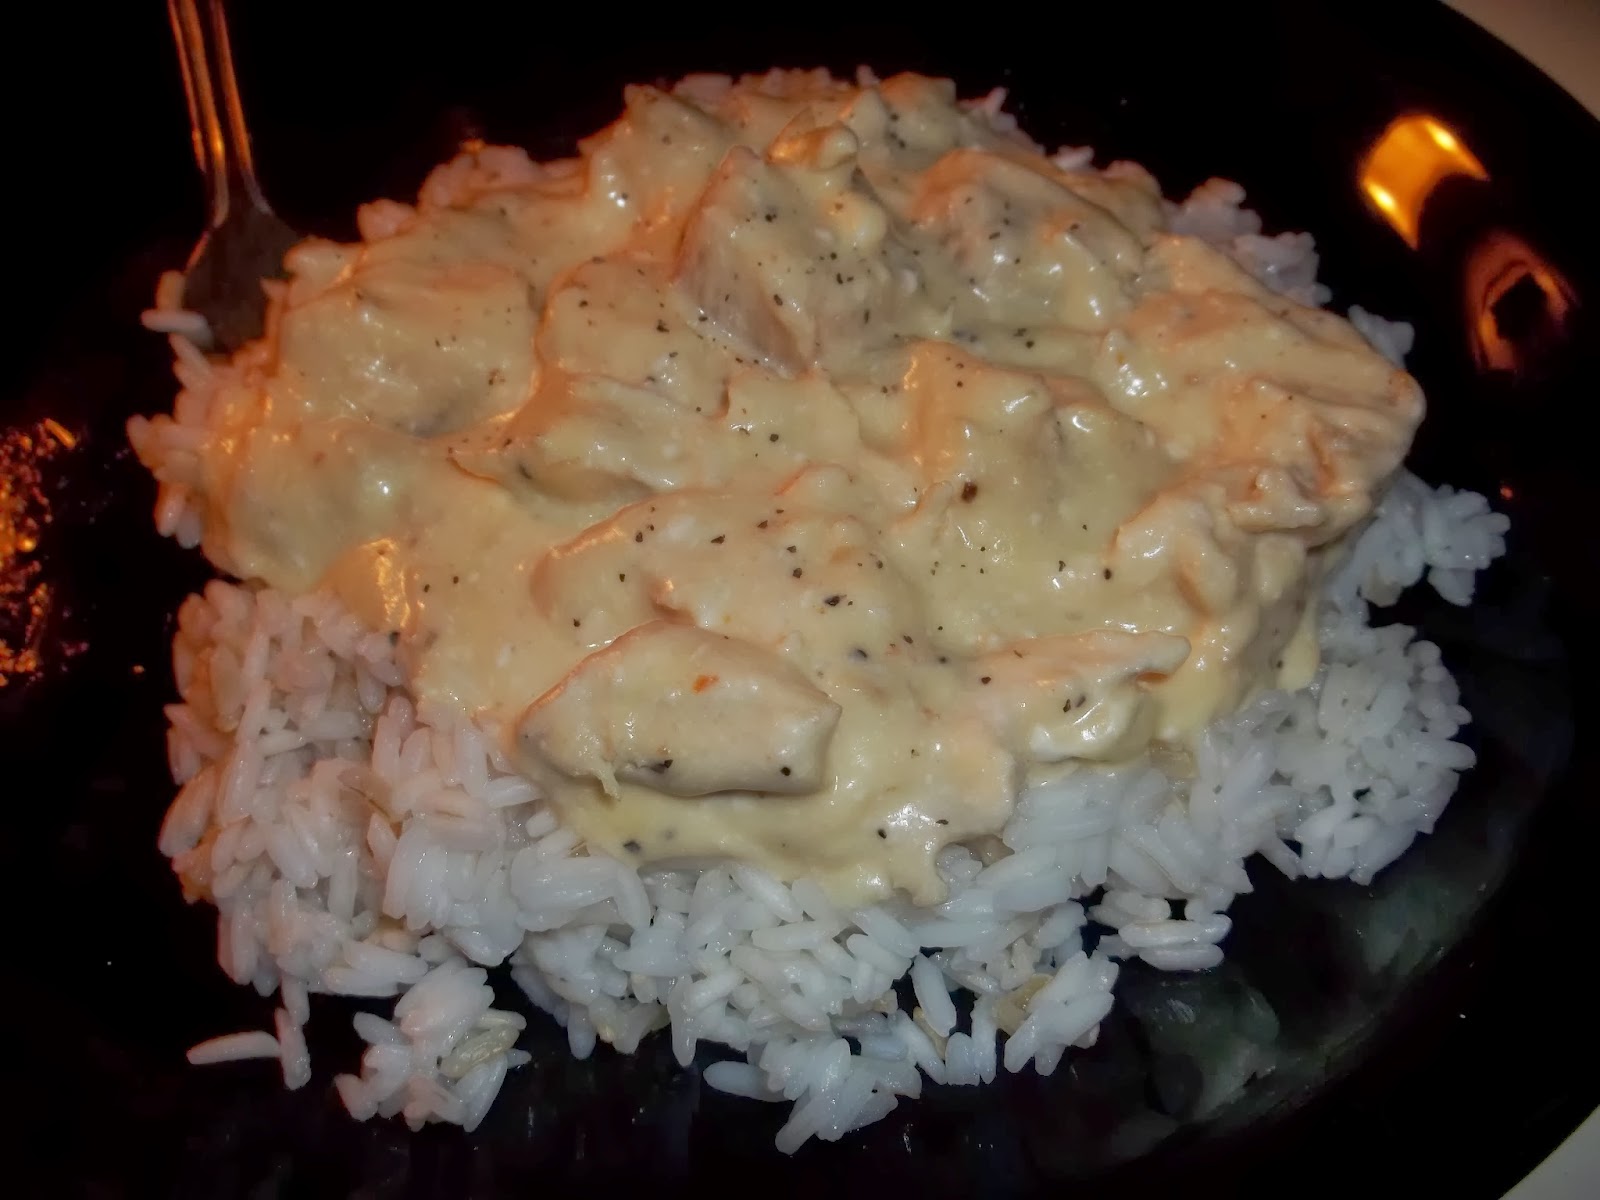
Slow Cooker Chicken Stroganoff


Holy Cow, was this delicious! Easily one of the most heavenly things I've eaten this year. Slow cookers are so awesome for 'set it and forget it' meals. So I'm kicking off the Killer Gourmet New Year with this amazing recipe! Let us..begin!

Things you will need:
  • 4 skinless, boneless chicken breast halves - cubed
  • 1/8 cup margarine
  • 1 package dry Italian-style salad dressing mix
  • 1 (8 oz) package of Cream Cheese
  • 1 can condensed cream of chicken soup 
The only thing you really have to do for this recipe is cut up the chicken, and that only takes like a second. Not even a second. A millisecond.


One millisecond later, throw that chicken in the crockpot and add the butter.


And the dressing mix....


Mix it all together...


And cook on LOW for 5 hours. Seriously, just walk the hell away for 5 hours.   
Stupid easy, right? 

'I KILL YOU!'

Five hours later, you will add the cream cheese and soup mix....


Mix it all together and let it cook on HIGH for 1/2 hour or until it is heated through. 


This is so (the opposite of) visually pleasing!

Now you're ready to spoon your Slow Cooker Chicken Stroganoff over some white rice or egg noodles. The flavor here was unreal...I was actually very surprised at just how amazing this tasted. 


Enjoy. ;)

Monday, July 29, 2013

Chicken Cordon Bleu for Newbs!


One of the things I love about doing a cooking blog is it forces you to try new and interesting recipes. Chicken Cordon Bleu is one of those things I always thought of as too hard to do, so I never even attempted it. Something about having to roll up ingredients with toothpicks...and hope it will A. Hold its shape and B. Cook all the way through...just seemed impossible given my limited skill set...but all of a sudden, today, I woke up and decided I was gonna try and make this.

*Derpy Edit -- I should probably give you a list of ingredients:

  •  6 Boneless Chicken Breast halves
  • 6 Slices of Boiled Ham
  • 6 Slices of Swiss Cheese
  • 3 Tablespoons Flour (pretty sure I used a lot more than that.)
  • 6 Tablespoons Butter
  • 1/2 Cup White Wine
  • 1 Tsp Chicken Bouillon Granules (go easy on this..)
  • 1 Tablespoon Cornstarch
  • 1 Cup Heavy Whipping Cream
For starters, preheat the oven to 350. Now, because Chicken Cordon Bleu needs nice thin slices of chicken, I decided to make a cooked, shredded chicken meal for tomorrow (Southwestern Egg Rolls, fyi,) thus allowing me the luxury of keeping that nice flat top piece while tossing those weird shaped under pieces into something else. Using a nice sharp knife (by the way, nice sharp knives DO matter...it took me a stupid long time to finally understand this.) slice your chicken in half like the illustration below..and just use those pretty top pieces. (Bottom pieces go into a foil hell all their own.)


Each thin slice of chicken now gets a slice of ham and a slice of swiss folded onto the top of it. I literally went to the deli and asked for SIX slices of Ham and SIX slices of Swiss Cheese, and the young woman behind the counter literally rolled her eyes at me. But why get more than you need?!


There are two methods to rolling these things up. The more common is to roll it up thin end to fat end long ways, and the other is to just fold it in half. Being a newb, I tried both ways to try both methods out. Once I rolled them, I secured that thing with a TON of toothpicks...because bitches love toothpicks. Meanwhile, I melt some butter (Did I say 'some?' How about six freaking artery clogging tablespoons worth?) in a pan over med-high heat. (Downs a handful of Simvastatin)


(Picture of butter melting in a pan...because Melted Butter!) 

Dredge the chicken pieces in flour, or...flour mixed with some seasoned bread crumbs. Some people dip them in egg first. I didn't do this..because after using SIX FREAKING ARTERY CLOGGING TABLESPOONS worth of butter, I am going to pretend to be health conscious. That...and this particular recipe didn't actually call for it.

(Dredging the chicken roll in flour)
(Is it me, or does this look pornographic?)

And then, why not just go ahead and toss that chicken on into that sea of butter. 


So the idea is to brown the chicken on all sides, and you would THINK that the cheese would fall out and it would get really messy, but this didn't actually happen. (Well, it did a little, but just a very teeny little.) You want to fry it long enough in the butter so that the sides get nice and brown. I started with the 'non open' sides down and then moved them around, which..requires a little creative work on your part since there are toothpicks fighting you the entire time. I used two forks to turn them...worked like a charm. 


(Chicken getting golden brown.)
(This is when my husband actually come downstairs to ask what I was cooking.)

Now that the chicken is brown, you put it in one of these things and stick it in the 350 oven for 25 minutes.


I'd like to point out, at this time, that the rolled chicken seems to be holding up better than the folded chicken, although in the end, they tasted exactly the same, so...take from that what you will. While this is cooking, we'll make the sauce. Now, I'll be honest...I didn't care for the sauce that came with this recipe. It came out too salty tasting to me. There are a few dozen different recipes for sauce for Chicken Cordon Bleu when I looked on the net, all with varying ingredients, and I'm sure one of them is delicious. But here is the sauce I didn't like...because I took pictures and well, you may as well learn from my mistake. 

You pour a half cup of white wine into the used pan (of butter goodness,) along with a teaspoon of chicken bouillon crystals. (I think the bouillon is what made it taste salty...so maybe try half a teaspoon first. Like, a real half teaspoon, leveled....) (I used one of those haphazard slightly heaping teaspoons...which may have been a bad idea.) Mix the cornstarch and whipping cream in a separate little bowl and then whisk that into the pan, lower the heat and let it simmer for ten minutes. It does thicken up nicely.


 (I...seriously messed up this sauce somehow...)

After twenty five minutes, I checked to make sure the chicken was cooked through nicely, which it was. And here's the finished product! 

(Why yes, that IS a LAKE of butter..but look at my beautiful CHEEEKEN!)

When I cut open the rolls, they were indeed perfect inside, much to my surprise, and they tasted AMAZING, as in a full ten on a scale from one to ten! The folded ones also tasted amazing, and while not as aesthetically pleasing, I found no real difference between the two. Even without my completely messed up sauce, these things were heavenly to eat and now that I've finally got my first Chicken Cordon Bleu under my belt, I plan to make them more often. Hopefully, with a much better sauce. :)


Sunday, March 4, 2012

Spinach Chicken Crepes

 
It takes about an hour of work to make these sumptuous Spinach Chicken crepes, so I only make them once every two months or so, but they are sooo worth the time. This recipe makes twelve crepes, and I usually cook six and either refrigerate or freeze the other six to eat at a later time. If you are feeling adventurous one day and wanna be all pro in the kitchen...these are the things to make!

Filling Ingredients: 
  • 2 1/2 cups ricotta cheese
  • 2 cups grated asiago cheese *
  • 3 eggs, beaten to blend
  • 1/2 package fresh spinach (or...half a can works too)
  • 1 onion, finely chopped
  • 1 lb cooked chicken, chopped   
  • Jar of Alfredo Sauce for topping. 
* - I use the grated 'Italian Mix' cheese sometimes because not every store carries the grated asiago. So long as it contains asiago cheese, it's fine. The mix cheese is very close to the same flavor.

Crepe Ingredients:
  • 3 eggs
  • 1 cup water
  • 1 1/2 cups all purpose flour
  • 1 teaspoon salt
  • 1/2 cup fresh snipped chives (*green onions work just as well and is what I use here)  
  • olive oil spray
Prepare the crepe batter first. Add the eggs and water and combine well. Add the flour and salt, and process until mixture is very smooth. Stir in the chives or onions. Place in a bowl and let sit for 30 minutes in the refrigerator.

Meanwhile, combine the ricotta, asiago (save a little cheese to sprinkle on top later) and eggs in a large bowl. Add the chicken and onions. Regardless of which kind of spinach you use, canned or fresh, stick it in the microwave for a minute to remove some of the moisture from it. (If you use the canned stuff, drain it really really well first)  Fold the spinach into the ricotta mixture.

                                      (Yes, it sort of looks like greenish gunk at this point)

To make the crepes, lighty grease a pan and heat over med high heat. Temp wise...think pancakes. You want these crepes to come out rectangular in shape. There's a way easier way of making crepes than to hold the pan at an angle and swivel it around. I just pour like a quarter cup of mix onto the pan and then take a regular straight edged spatula and spread the liquid into the shape I want.  Observe my very brief video. (I lay some oil on the side of the griddle and shove it around with the spatula every once in awhile as needed..so ignore the LAKE of oil on the side there, lol)


Then you turn them over and let them cook 10 seconds on the other side. I use tiny squares of wax paper to separate them as I stack them. I have no idea if they stick together or why I started doing it that way, but it's habit now. :)


Preheat oven to 325 degrees. Lightly grease bottom of baking dish.

Fill each crepe with 1 cup ricotta filling, then roll.


 Place in baking dish, seam side down.


Pour the Alfredo sauce on the top of the crepes and sprinkle with a little cheese.


Bake for 30 minutes or until bubbly.


The filling, the crepes and the sauce are have their own unique, amazing flavors and the combination of tastes is OUT OF THIS WORLD delicious! 

Thursday, March 1, 2012

Spanish Rice Bake


This one takes a little work, but the taste is amazing!


Ingredients:
  • 1 pound ground beef
  • 1/2 cup chopped onion
  • 1/4 cup chopped green bell pepper
  • 1 can diced tomatoes
  • 1 cup water
  • 3/4 cup uncooked long grain rice
  • 1/2 cup chili sauce
  • 1 teaspoon salt
  • 1 teaspoon brown sugar
  • 1 teaspoon ground cumin
  • 1 tablespoon Worcestershire sauce
  • 1 pinch ground black pepper
  • 1/2 cup shredded Cheddar cheese
  • 1 tablespoons cilantro
  1. Preheat oven to 375 degrees F (190 degrees C).
  2. Brown the ground beef in a large skillet. Drain fat and transfer beef to a large pot over medium low heat.  Stir in the onion, green bell pepper, tomatoes, water, rice, chili sauce, salt, brown sugar, cumin, Worcestershire sauce and ground black pepper.  (The temp is very important here. Too high and it burns the bottom a bit, too low and the rice comes out crunchy. A smidgen just under medium seems to work well.)
  3. Let this simmer for about 30 minutes, stirring occasionally. Pour into a 2-quart casserole dish. Press down firmly and sprinkle the top with shredded Cheddar. 
  4. Bake at 375 degrees F (190 degrees C) for 10 to 15 minutes. Dust top with Cilantro. 
*A word about Chili Sauce. The taste on Chili Sauces varies greatly from one brand to another. The more expensive ones are a bit more flavorful but they tend to be spicier as well. The Heinz brand I'm using here isn't akin to much more than a mildly flavored ketchup, but it's cheap and it does the job...but if you like your food a bit more spicy, go for one of the fancier (expensive) brands.    

And now for some completely unnecessary pictures.


You can chop up the veggies and toss them in the pot while the meat is browning. 


(Oooh, Pretty!) 


"We wanna go in the pot too!"


It's a FIESTA!


Topped with cheese and ready to go in the oven. You can stick it in the fridge this way and cook it whenever you want! (Well...within a day or two.) 


                                            The finished dish...and it tastes as good as it looks!


.